Posted: June 9, 2025
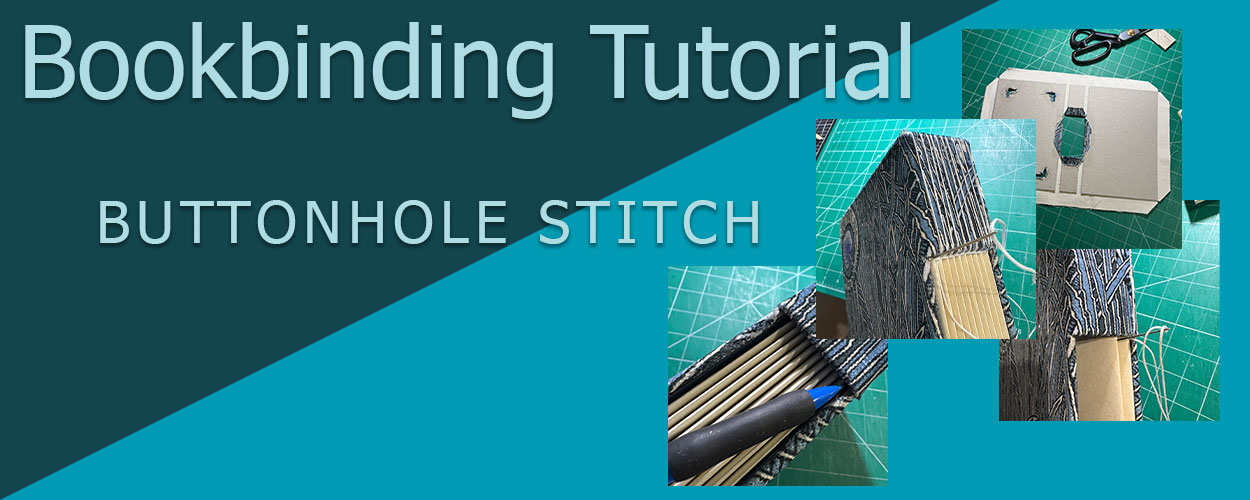
The buttonhole stitch method, as one of the medieval limp bindings like French link and long stitch, can be dated back centuries. It is well recognized by the gap in the spine of the book, allowing one to peek through to see the spine folds of the signatures within. There is a lot of creative freedom with this method, and it’s always fun to experiment with covers. It is an exposed stitch for multi-signature books. Here’s what you’ll need to make your own:
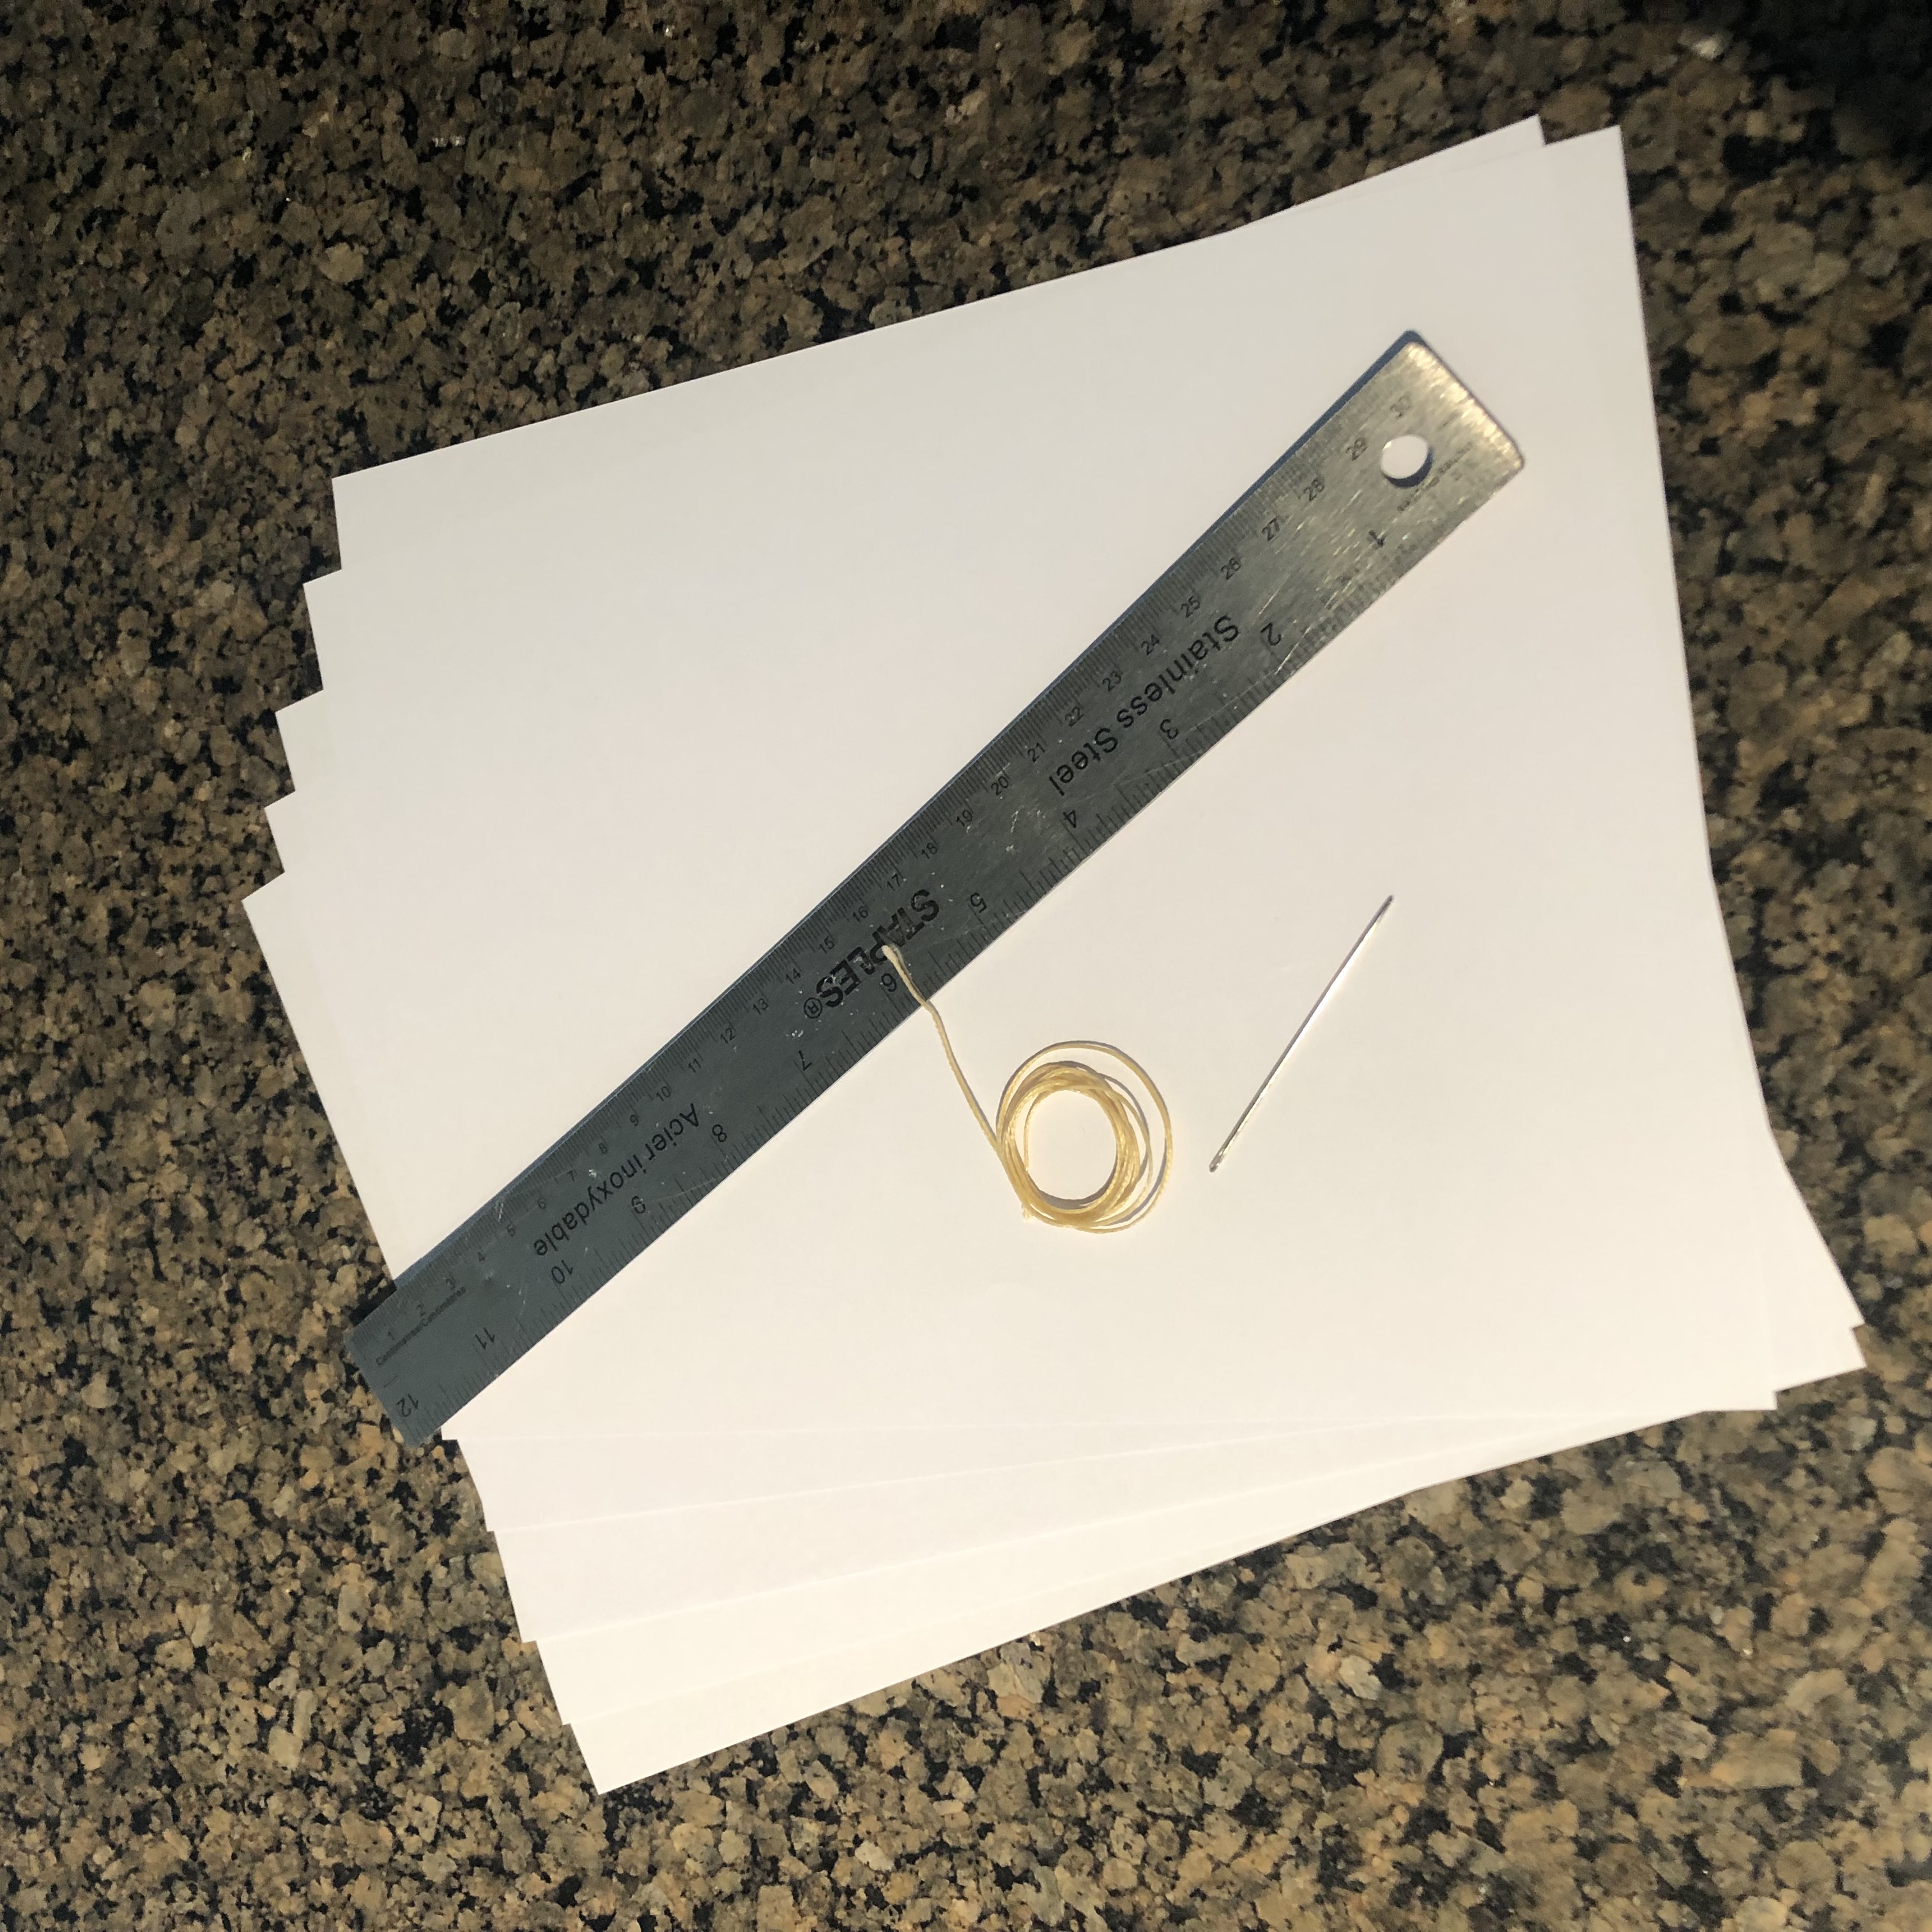
Fold your paper into signatures first. A signature is a collection of papers folded in half. You’ll need multiple signatures for this book, so divide your sheets into equal stacks, then fold and sort them together. Typically, a signature is 4 to 8 sheets (depending on the thickness of the paper). Thicker signatures are possible, but the recommended maximum is 15 sheets of plain copy (20 lb) paper. Otherwise, it’s too thick and the spine won’t lay nicely flat. This also makes folding, poking the holes, and stitching easier. My preference is 6 to 10 sheets of 24 lb writing paper.
When folding, I like using a bone folder for a nice crisp crease, but they aren’t necessary. A butter knife will do in a pinch, or even just your thumb nail. Gather all the sheets of paper for your signature and fold them all at once for a uniform fold. This allows the pages to sit nicely inside one another without gaps.
Materials
Fold the paper
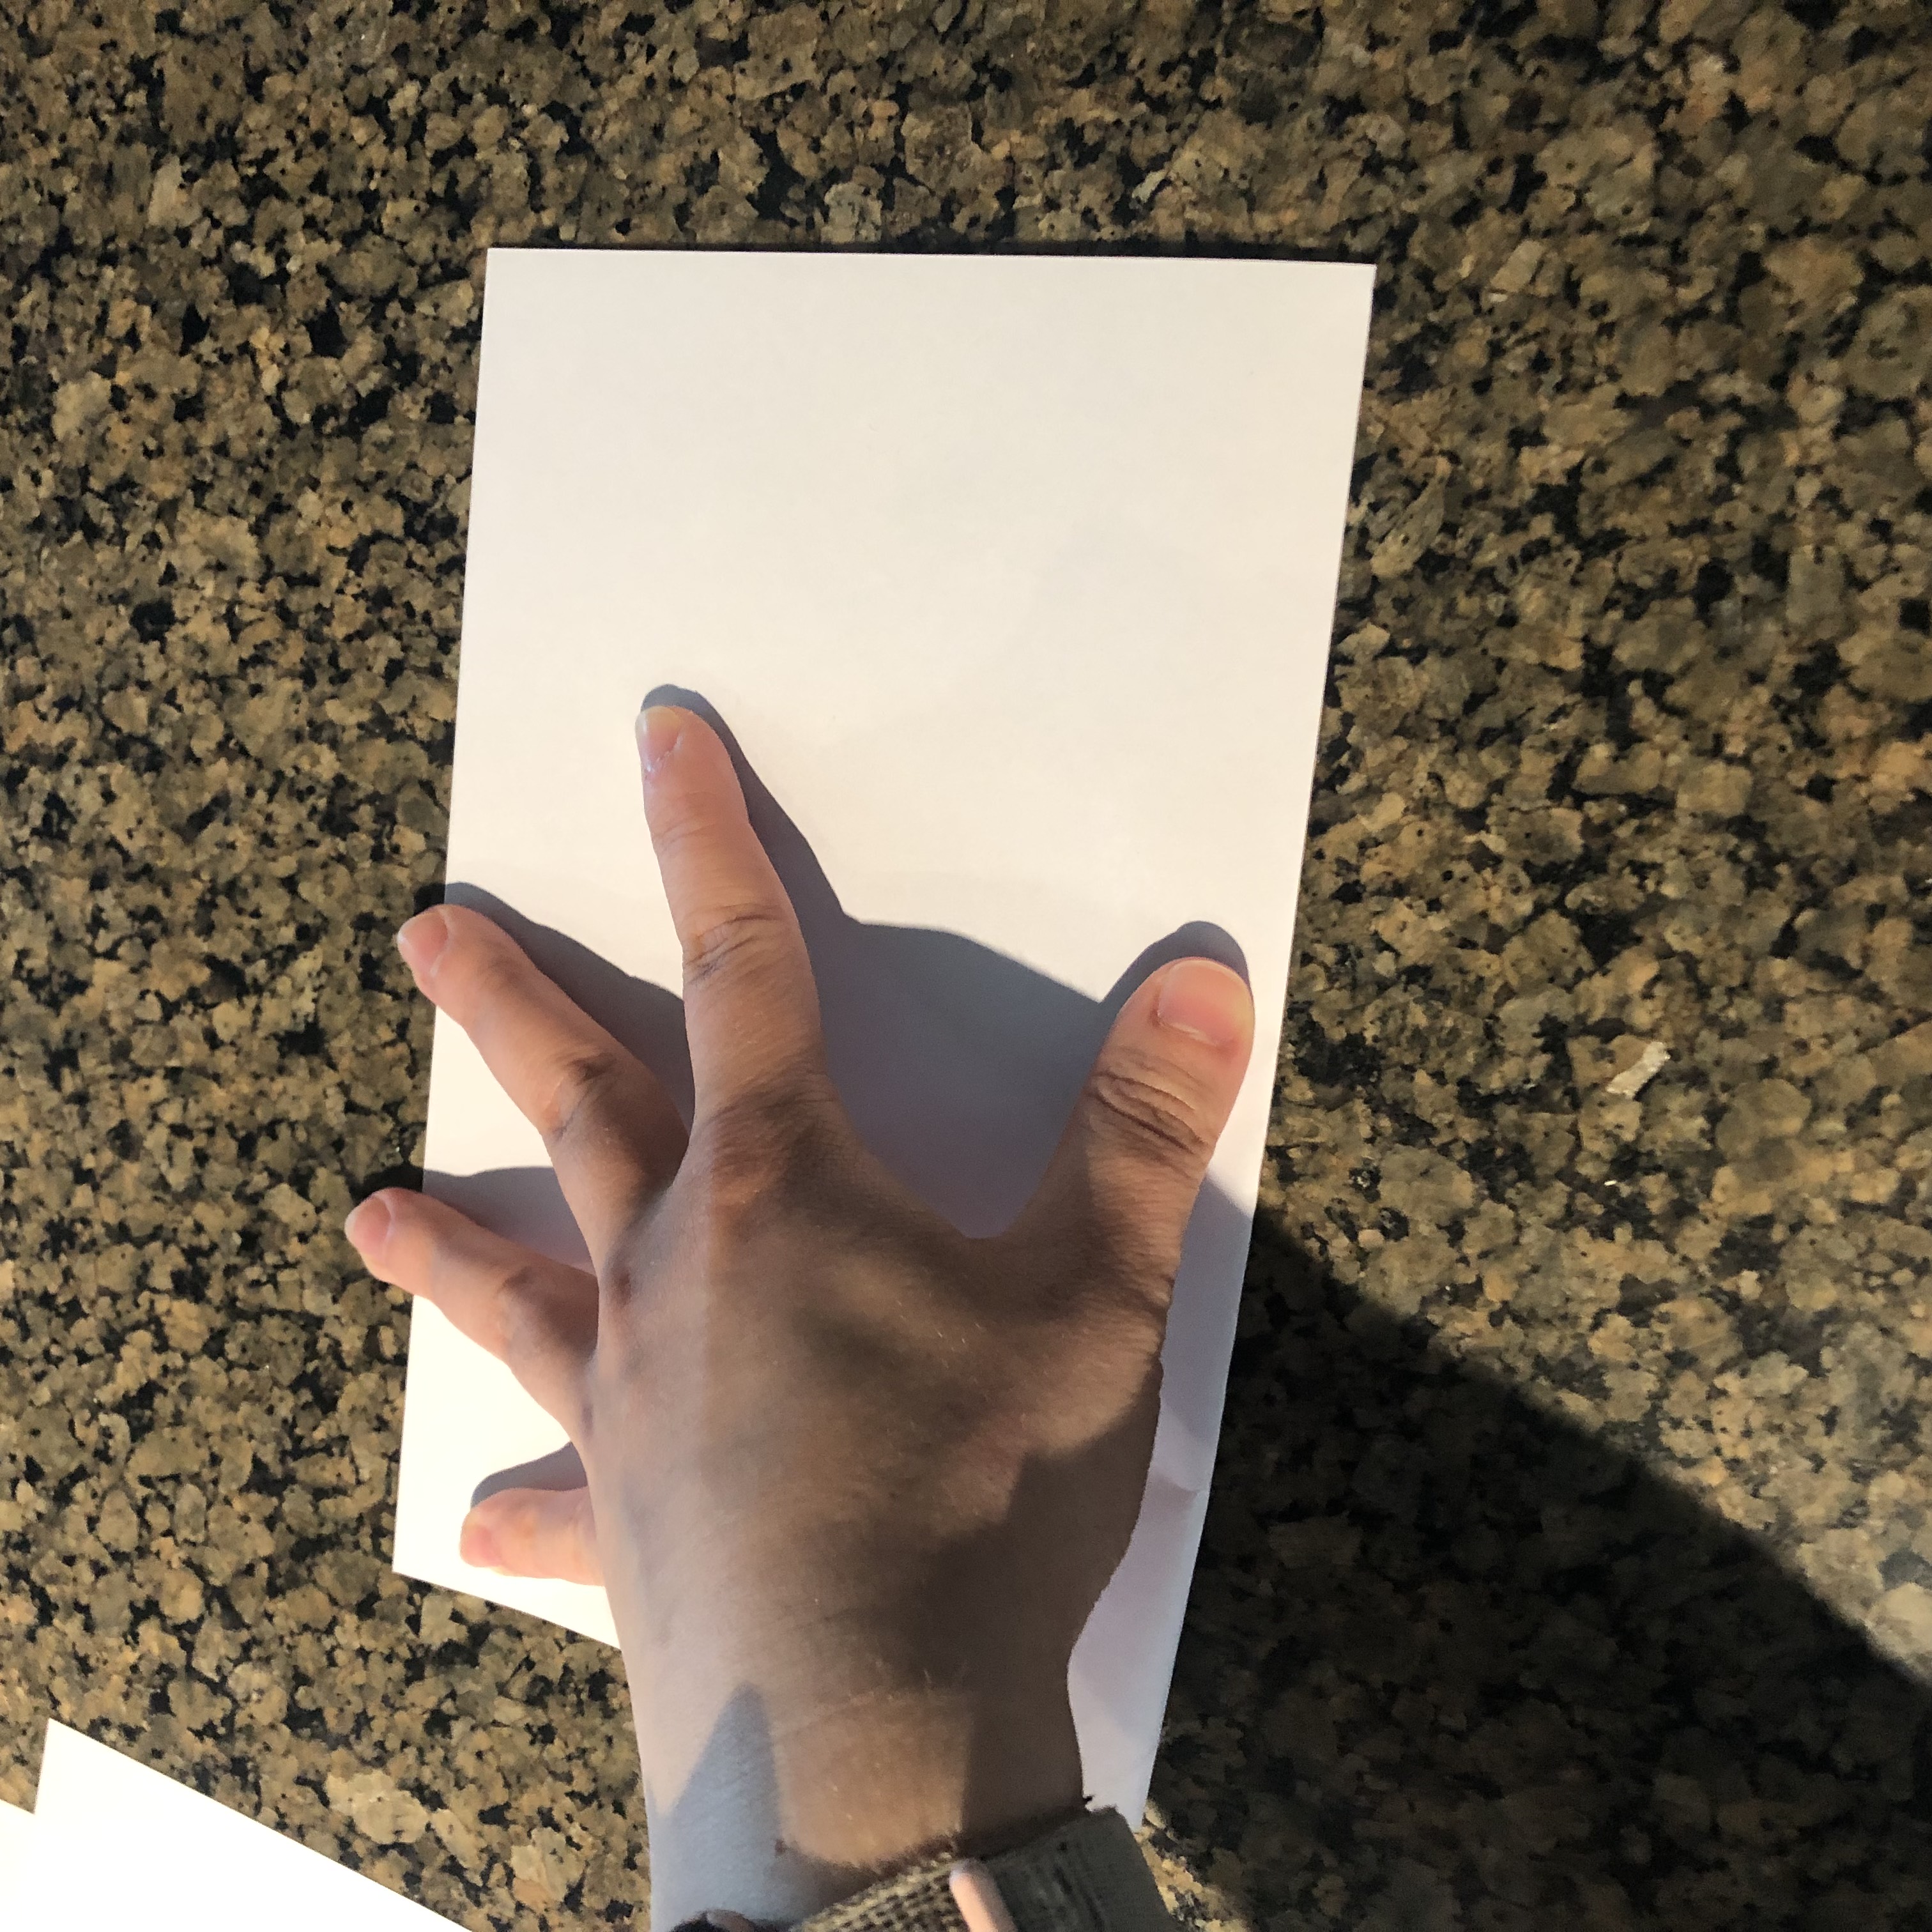
Signature
The next thing you need to do is trim the signatures (if you want to trim them at all). This is because it is quite difficult to trim after stitching. Premeasure and mark in light pencil where you want to cut. Ensure it’s correct. (Measure twice, cut once!) When trimming, line your ruler up along the edge of your paper (at measurements) and use a sharp X-acto knife to cut. Repeat on all sides you wish to trim. I recommend trimming both top and bottom if you need to take off height (rather than only top or only bottom), as the X-acto blade leaves a clean edge and you’ll likely want them to match.
Alternatively, you can make a deckle edge along your paper by tearing along a straight surface. Like with trimming, line your ruler up at the measurements. Gently tear, peeling the strip of paper away to leave a soft edge. You can do this on all three edges of the paper, or just the outside edge.
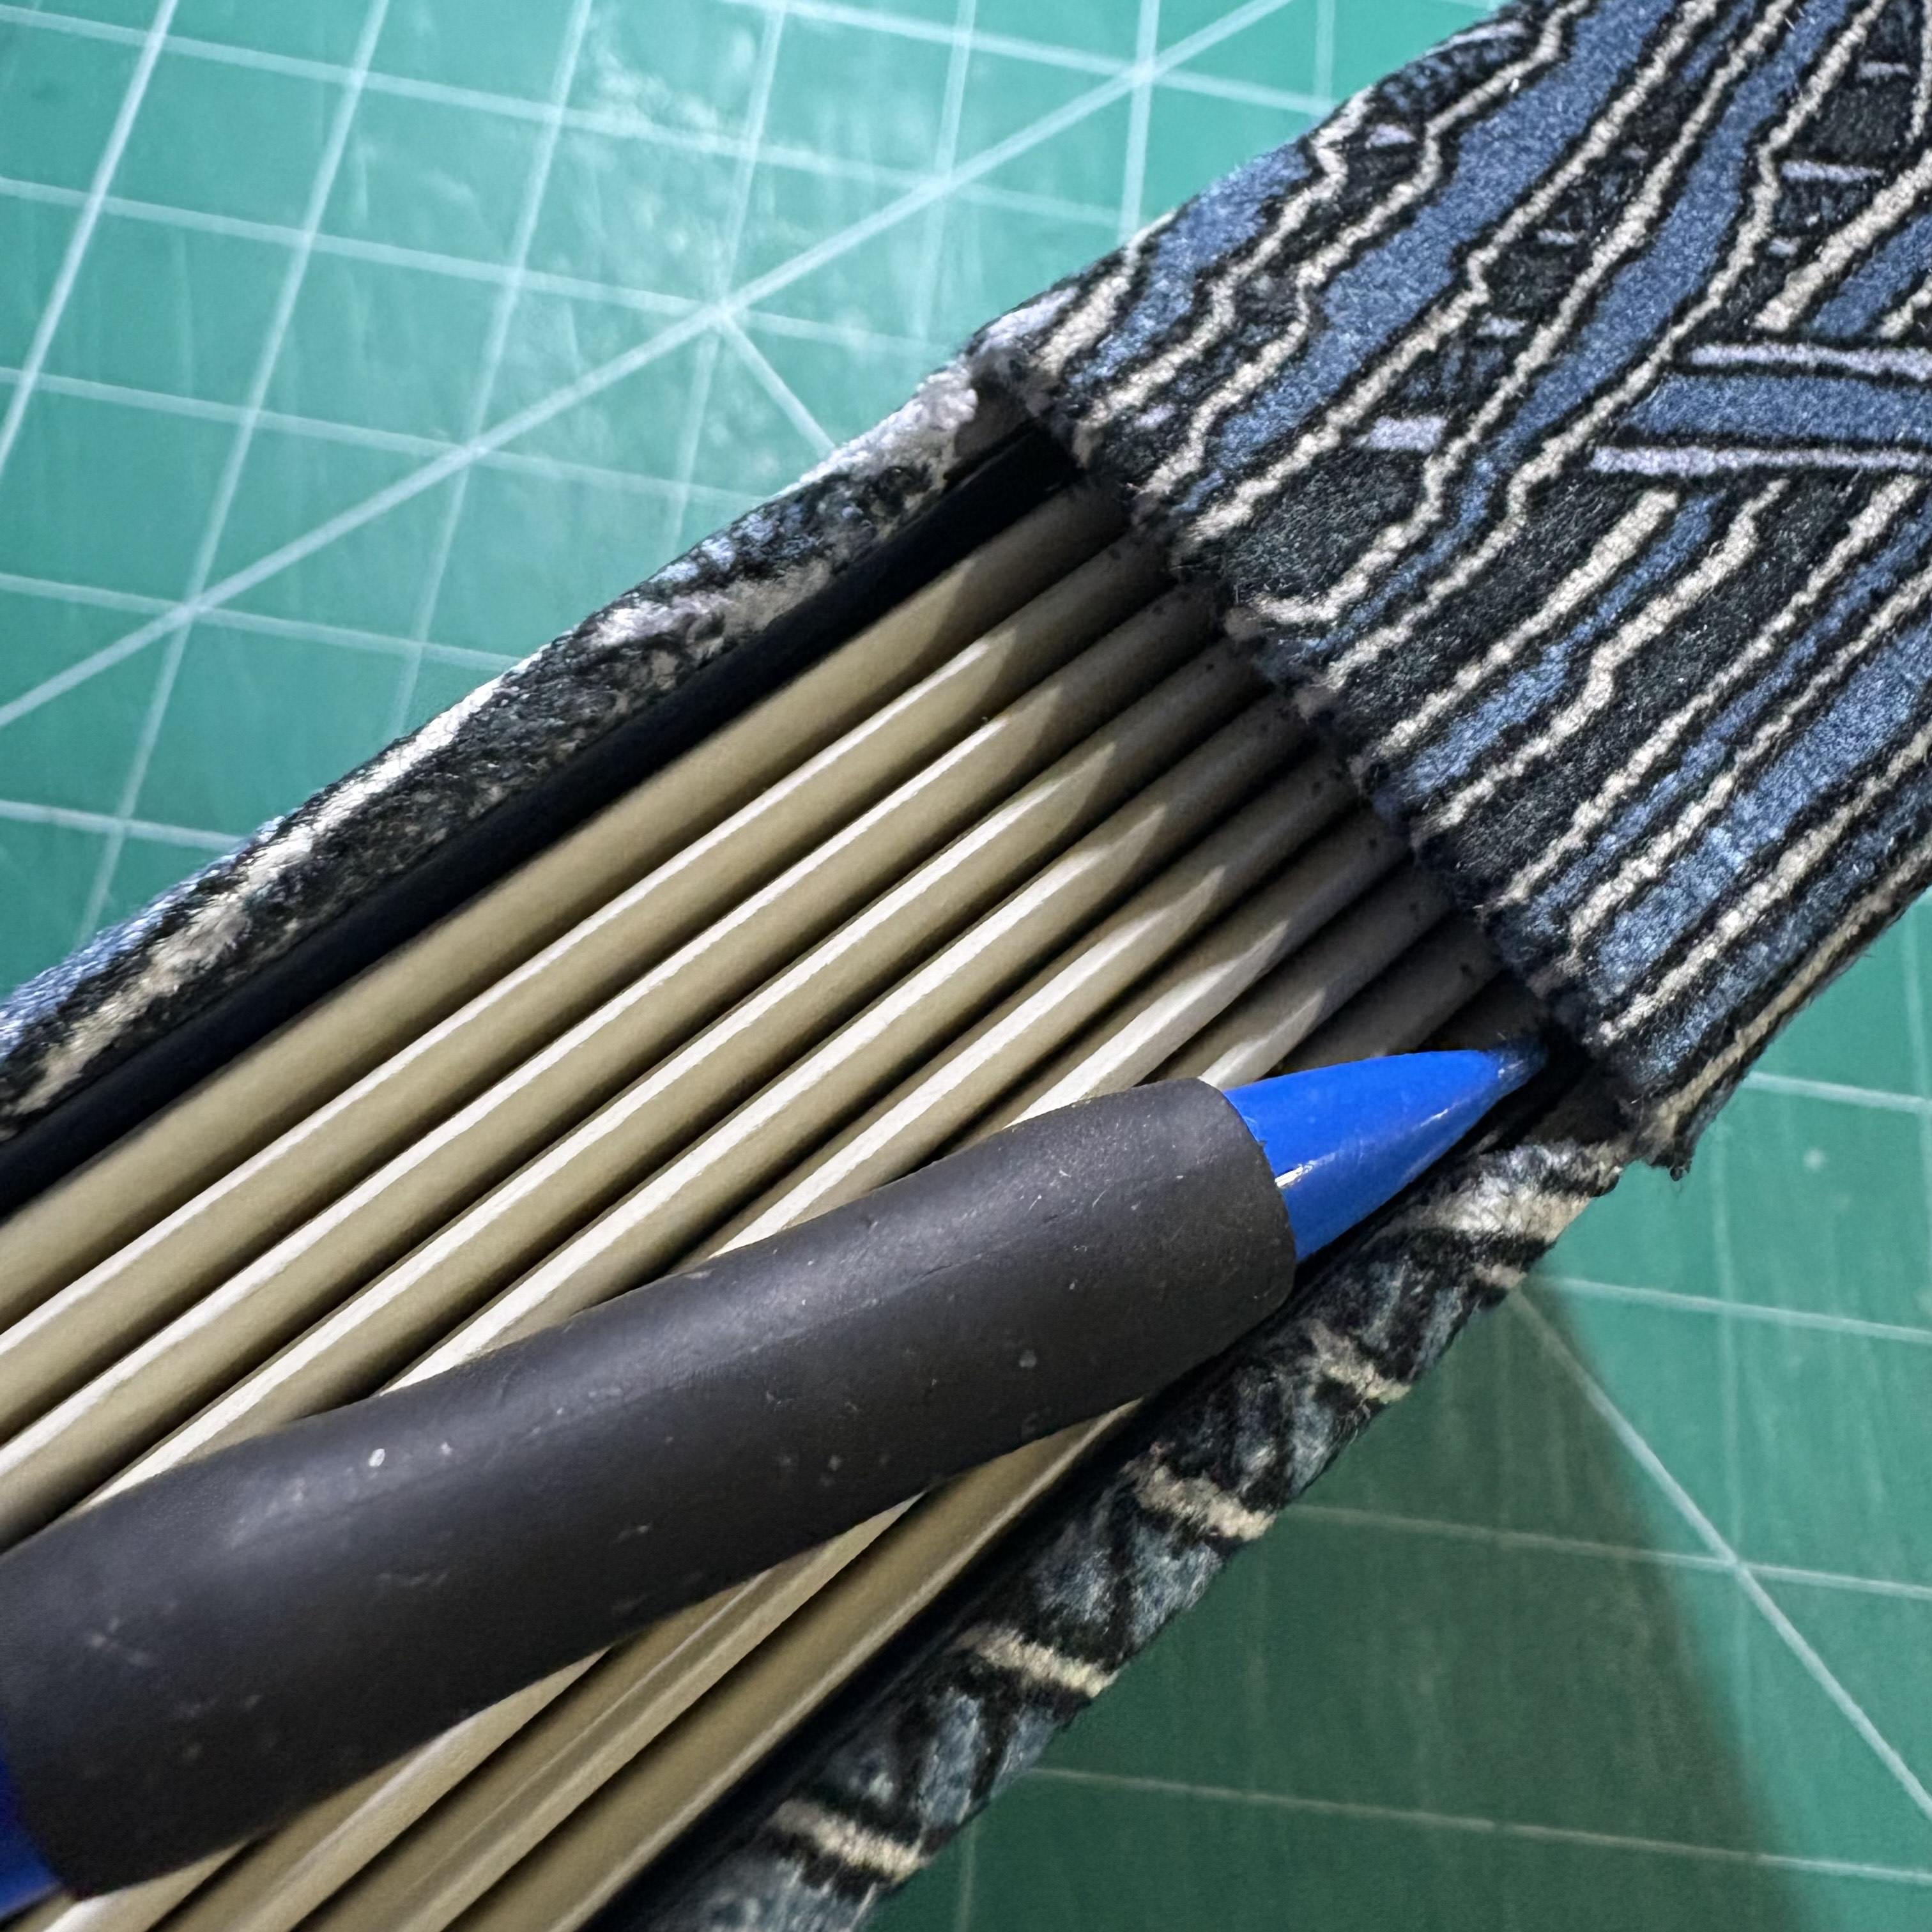
Buttonhole-stitched books are sewn directly to the cover. Unlike other methods, it is done in two parts: top and then bottom.
There are a few types of covers you can make for your book, and since the covers are furthermore so customizable, you want to make sure you do all the decoration before stitching.
Cardstock Cover Method: First and foremost, you can go with a simple cardstock cover. It is a single piece of cardstock folded in two places to make a U shape. To get the measurements, measure the width of your signatures; fold the first crease there. Measure the thickness of your spine by stacking all the signatures together. It should be a somewhat loose stack, but not too much, or the signatures will shift around too much once it’s stitched. Finally, measure the remaining width of the cover and trim off the excess paper.
From there, cut out a section of the spine. There should be enough material at the top and bottom of the spine to hold the signatures steady once stitched, but enough removed in the middle for a decent window. For example, on a book that is 8.5 inches tall, I would leave about 2 to 3 inches at the top and bottom (thus making a 2.5- to 3.5-inch window). You can cut other windows into the cover as well on the front and back.
*The window doesn’t strictly have to be a rectangle. You can cut shapes into the front and back covers as well to extend this gap. One bookbinder made a wedge shape and used bright pink interior paper and a green cover, making it look like a slice of watermelon. Be creative with it!
Your cardstock cover is ready; you can begin stitching.
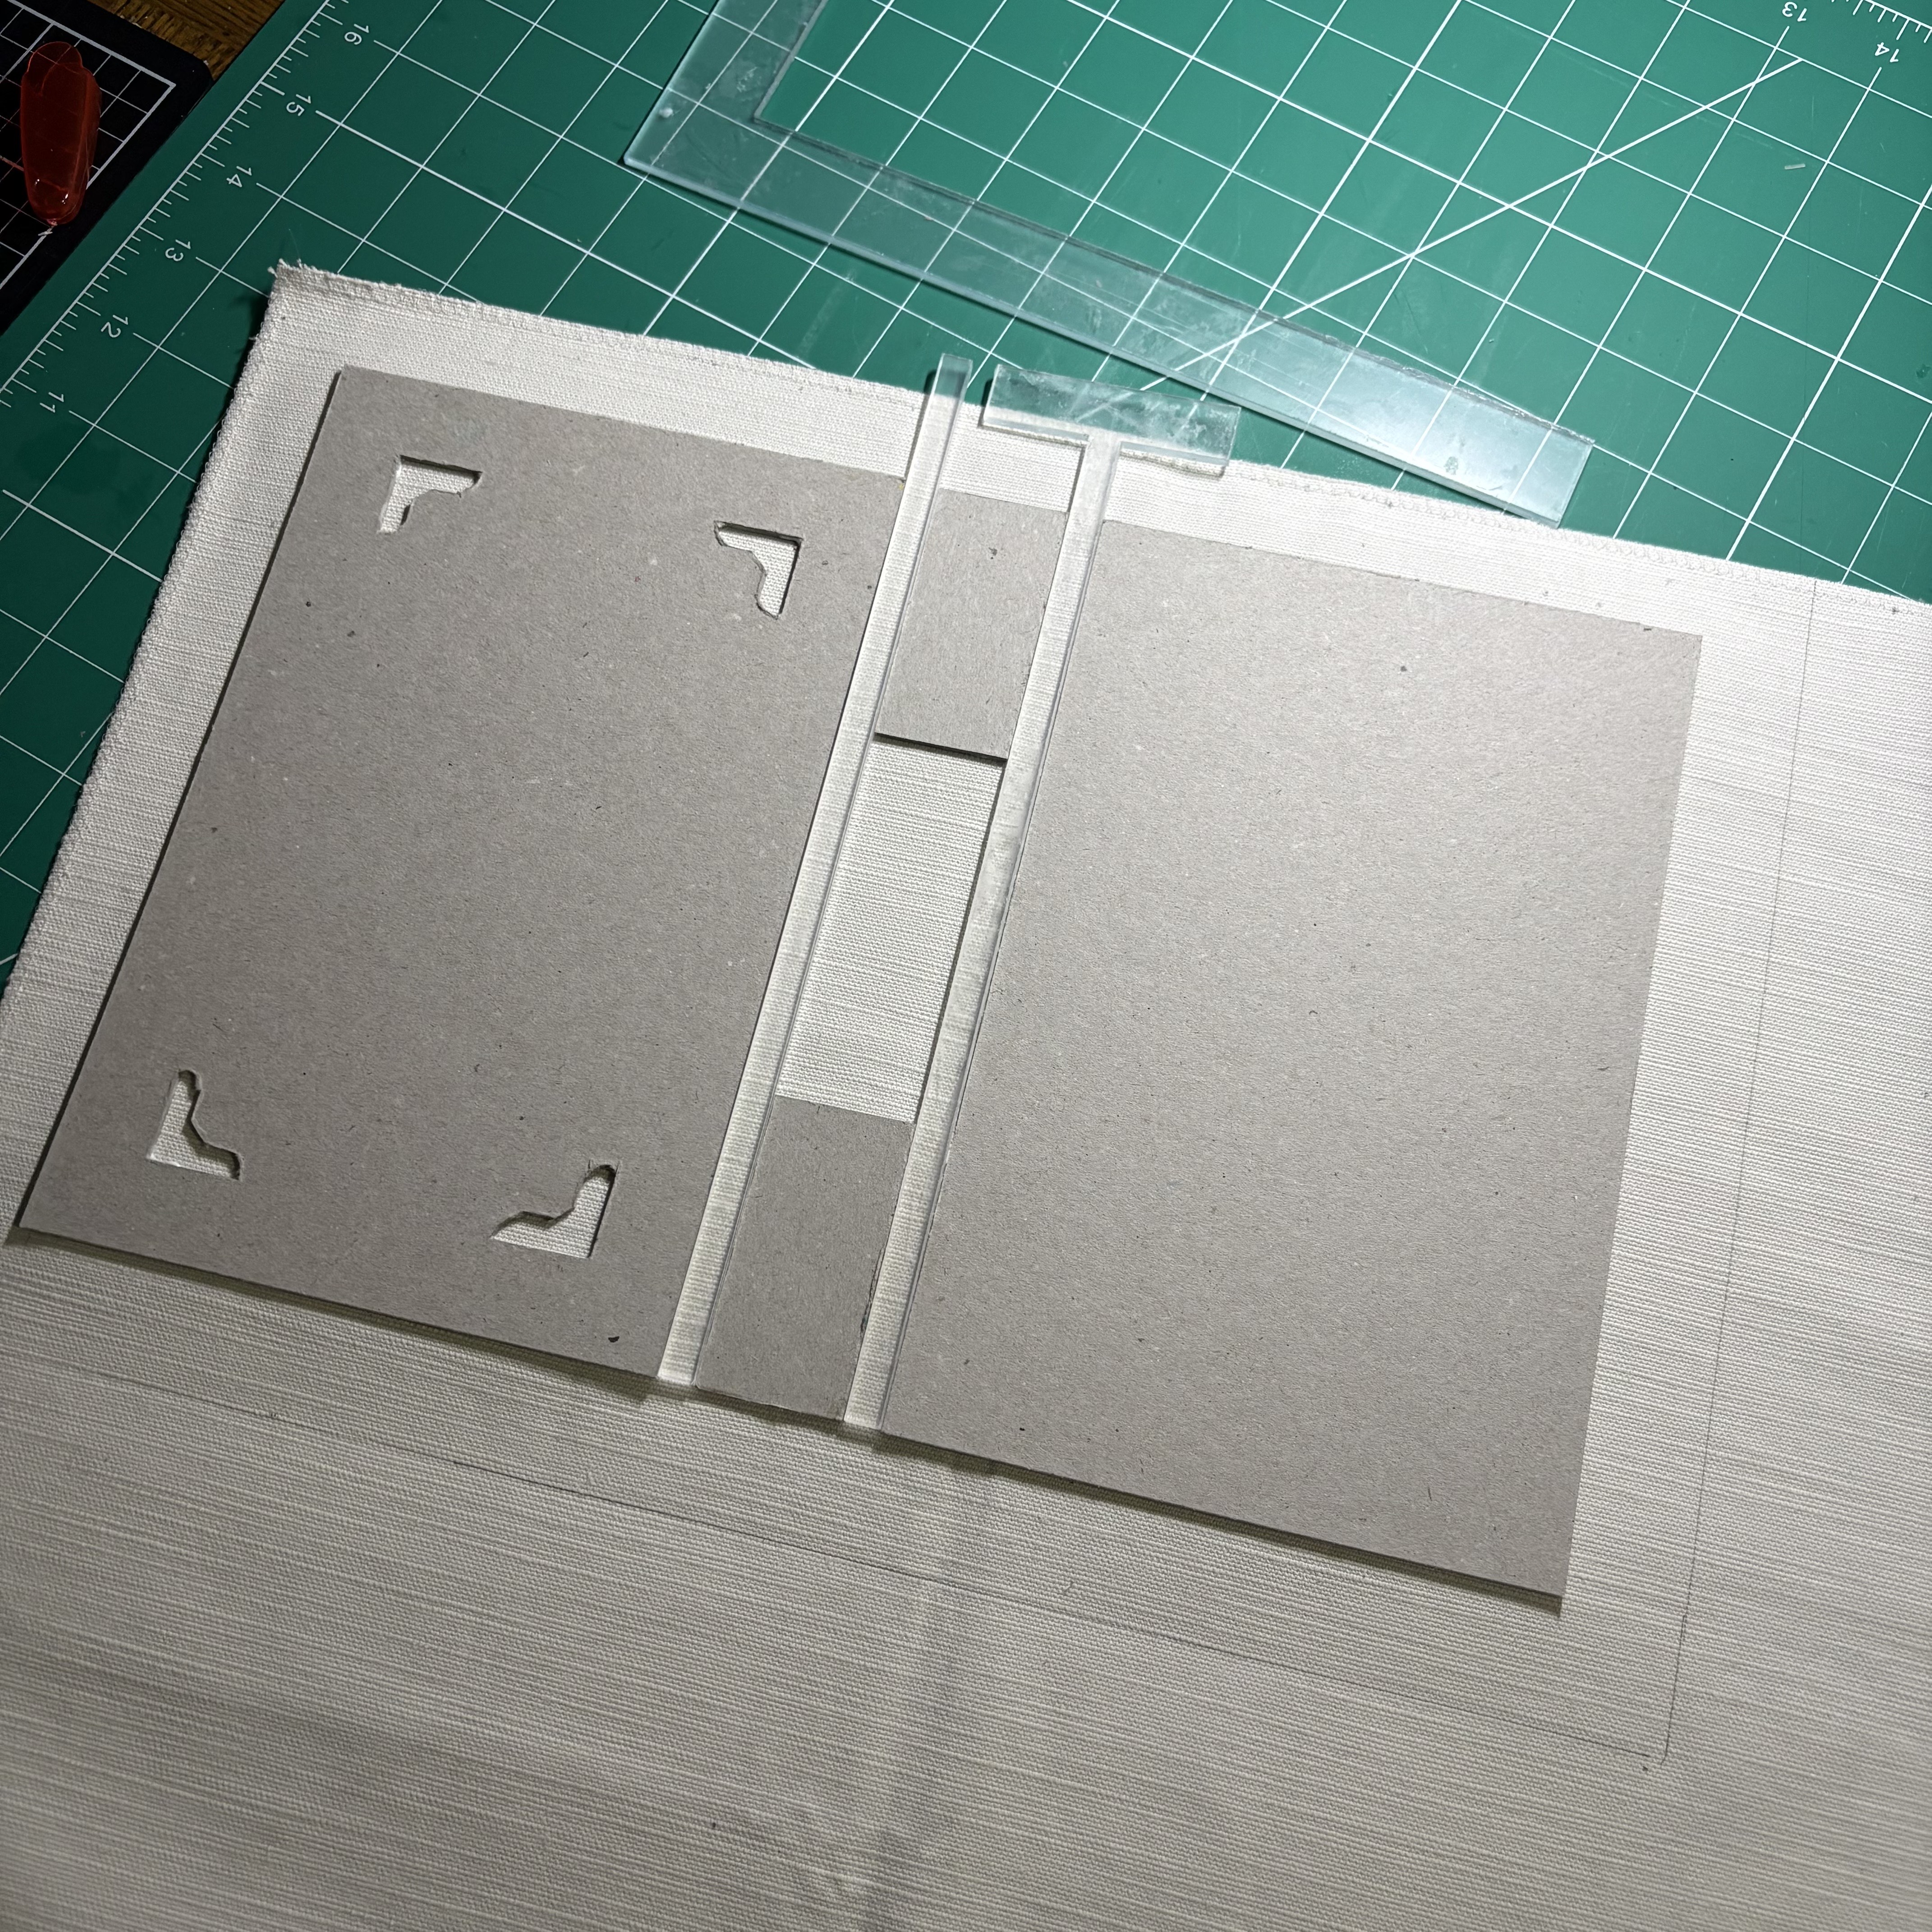
Hardcover Method: Alternatively, you can make a cover using book board. This can be done with or without book board along the spine (depending on your preference).
First, cut your board pieces to size. For this type of book, you’ll want the width and height of the board to equal the width and height of your paper. For example, folding a regular sheet of letter paper in half makes a 5.5x8.5-inch page, and thus your book board front and back cover pieces should each be 5.5 by 8.5 inches.
The spine, if you’re adding a board spine, will be done in two pieces. The width should be slightly wider than your stack of signatures (I try to add about 0.125 inches). The height can be any size, but like above, I prefer about 2 to 3 inches for sturdiness. Cut two pieces the same size.
Next is putting them all together using your cover material. It will all go on in one piece (but feel free to experiment with different material on the spine and/or covers). Measure out your fabric, paper, or material of choice, giving each cover about half an inch to one inch of border (depending on the thickness and stiffness of your material). Thicker material means a bigger border. Here is the formula in inches: 0.5 + front cover width + (0.125 to 0.25) + spine width + (0.125 to 0.25) + back cover width + 0.5. *Note that based on the thickness/stiffness of your material, you may add a 0.125-inch gap between the covers and spine up to a 0.25-inch gap. Use common sense to gauge what you think will work.
Mark the border lines so it will be easier to glue. Alternatively, you could simply cut a bigger piece of fabric/material than needed and trim afterwards.
Glue your chosen fabric, paper, or other material to the book board using a PH neutral glue like PVA (regular white glue will work in a pinch). Make sure to spread an even layer, not too light but also not too thin. Do this by applying the glue to the book board and lining up the front cover first. Using a 0.125-inch or 0.25-inch spacer (or by marking the measurements), line up the two spine pieces. Ensure that they are flush to the top and then bottom of the cover board (use a straight edge block or something similar for this). Once again using the spacer or measurements, glue the back cover piece on as well. Allow to dry.
If not using the spine board, simply measure out the space in between the front cover and the back cover as usual, with the spine width included (i.e. 1 inch spine means 1.25 to 1.5 inches of space). Glue on the back cover as usual. (For added support, you will later by gluing on a piece of cardstock for inner cover. Don’t worry about it for now.)
After gluing, cut the corners of the cover at 45-degree angles, then glue the two shorter sides, fold in the corners, then glue the two longer sides. For the board-spine book, cut an X shape across the gap between the spine window and glue the flap against the inner covers (you can trim or shave down thicker materials to lay flatter if desired).
Then, cover the interior with a patterned cardstock or paper. If doing it in one piece, the paper needs to be around 12 inches across, but you can use separate pieces of paper for the spine and both covers. I like using this method because it’s easier than cutting out the window from the single sheet. Glue the two pieces of spine paper first and then glue the front and back cover pieces separately. *See measuring below.
If using one piece, measure across the whole cover (leaving about a quarter-inch lip) and cut the paper to size. You can either cut the window for the spine before gluing or after, depending on your confidence level and precision. If using multiple pieces, cover the spine area and about half an inch over each cover (for hinge strength). Leave a lip. Then measure the front cover and back cover separately.
For the books without the spine board, using a single piece is just as easy, as you can cut both the fabric/material and the paper at the same time. Another option is to cut the window first and fold in the edges, then cover in the paper. *For this book, the paper should be a sturdier cardstock instead of thinner patterned paper, as this provides most of the support for your book’s spine.
Add any further decoration you want until you’re happy with the design. From there, your cover is ready for stitching.

Measure spine height

Cut book board and choose cover material
Glue pieces

Trim cover

Glue interior paper

Cover finished
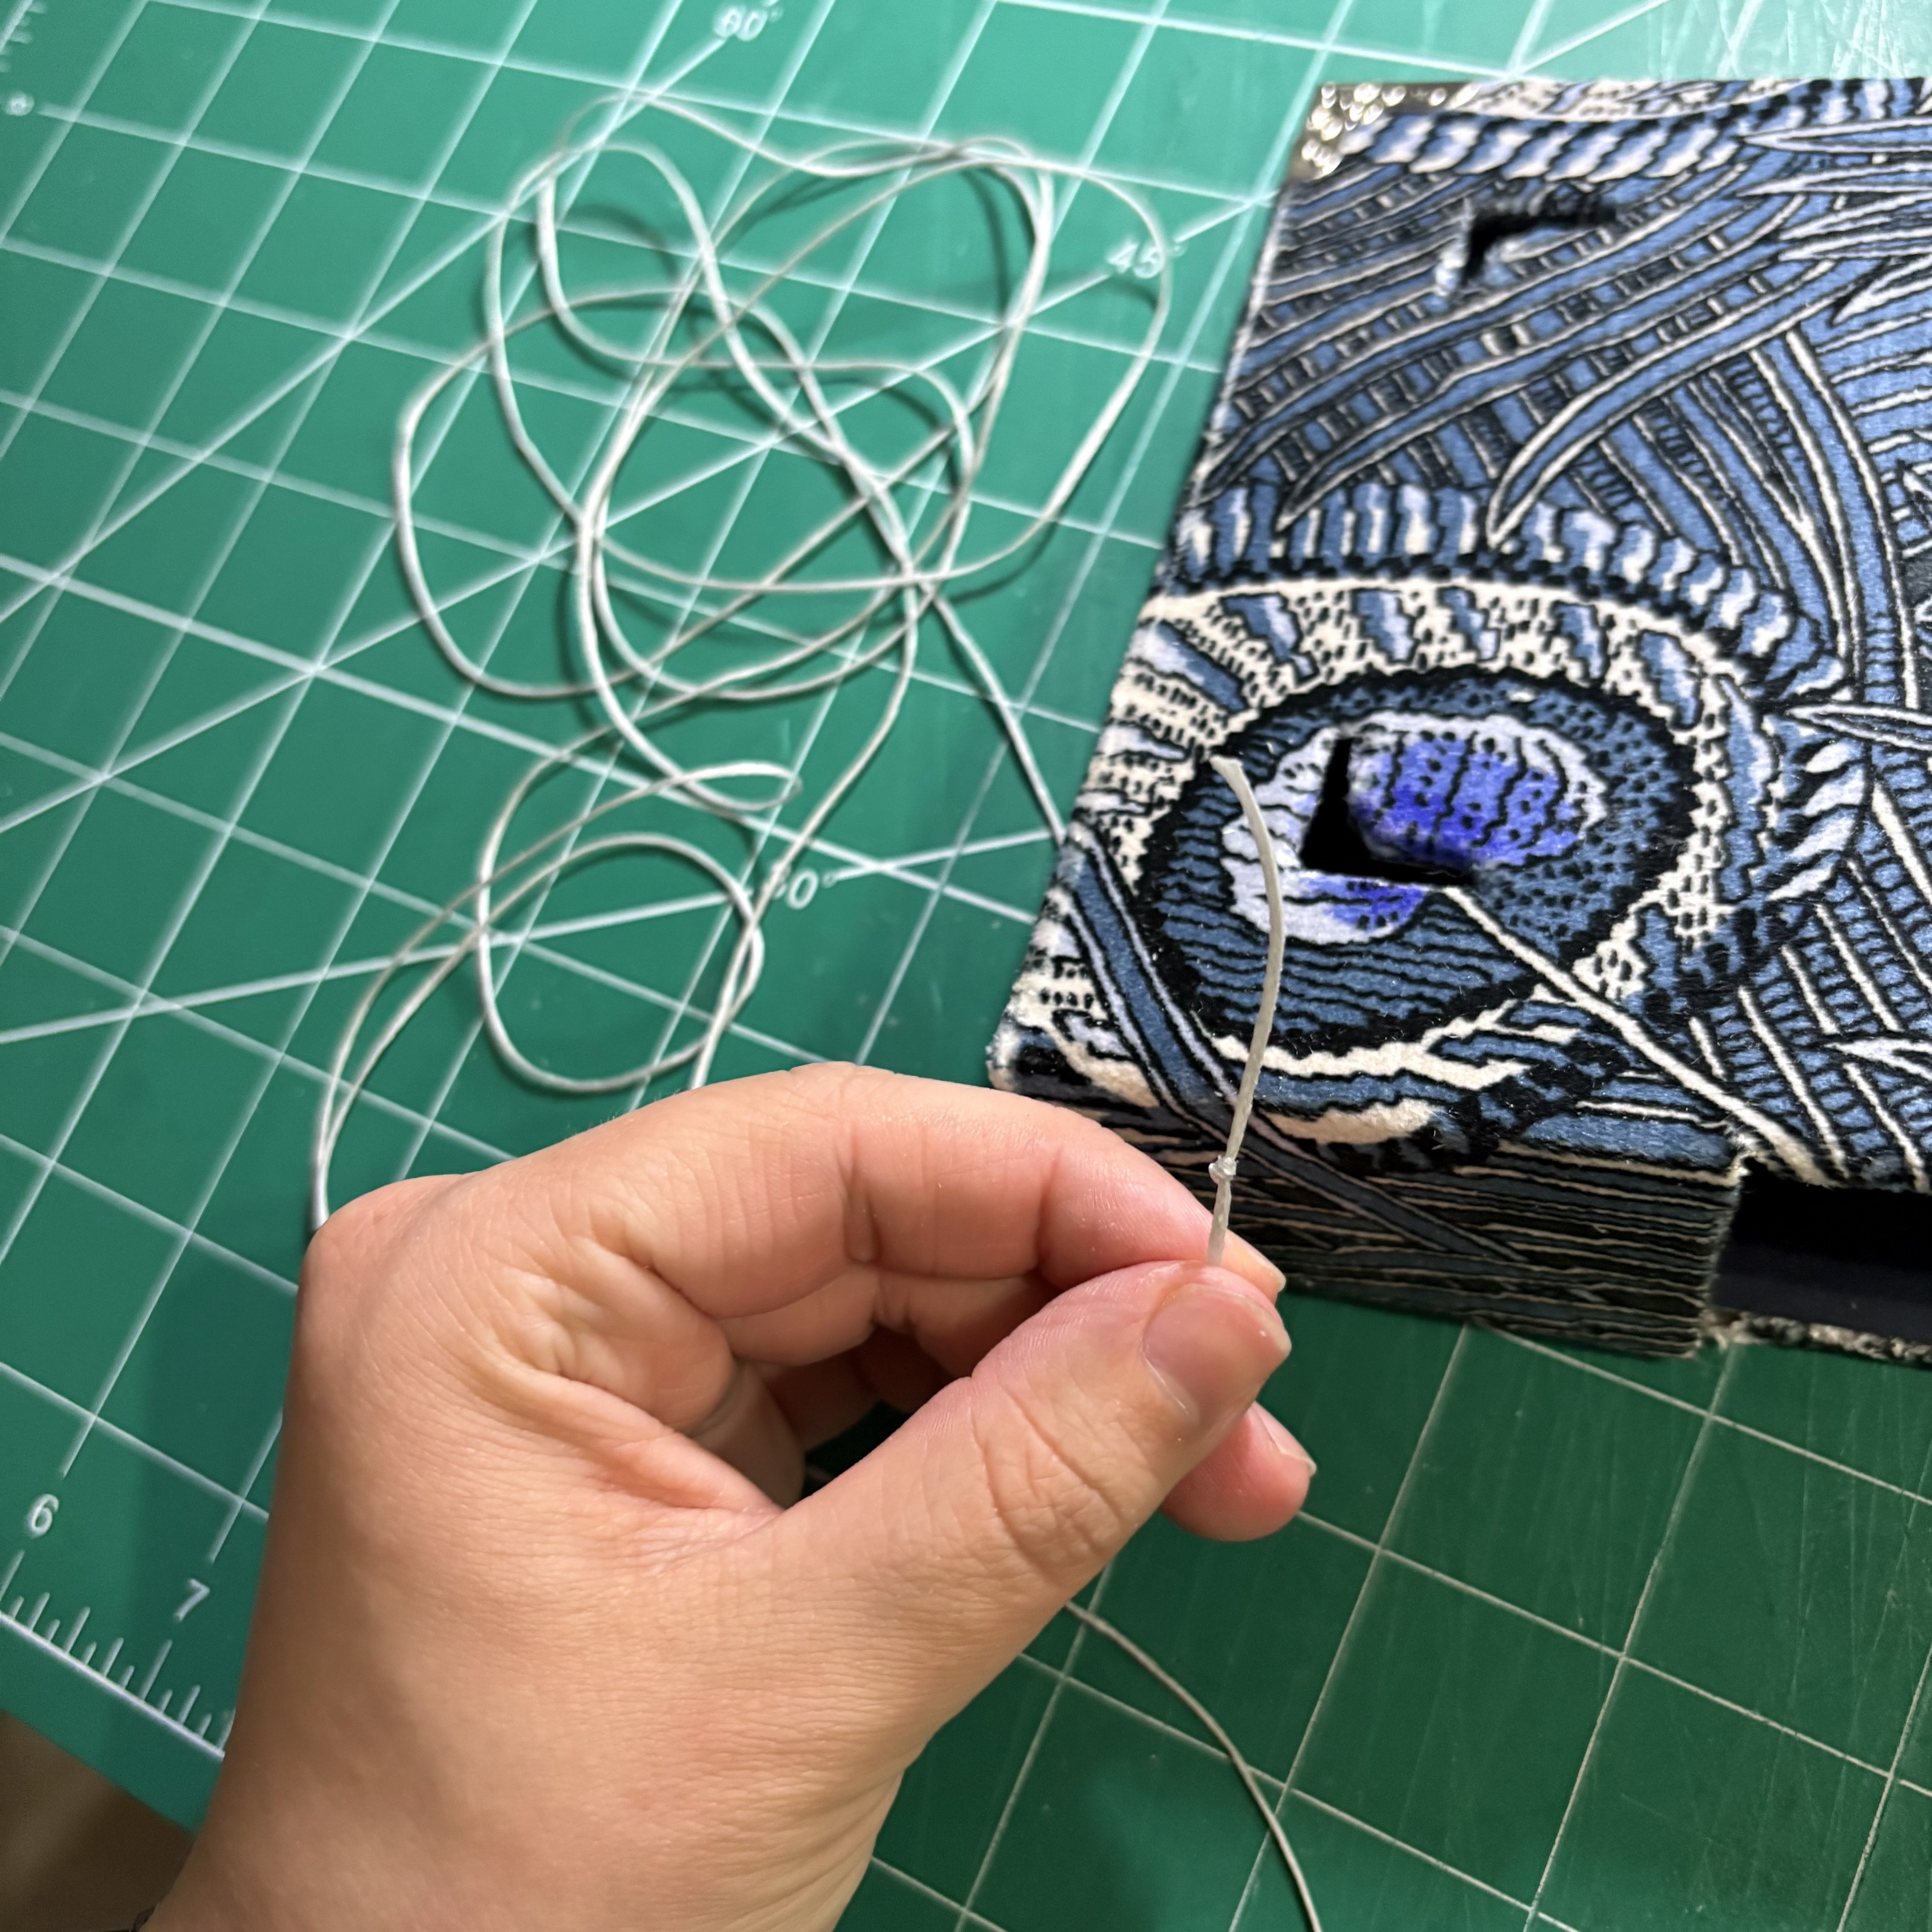
Once trimmed or torn, you will poke the holes into the spine of your signatures. Your book already has the window and therefore no further holes are needed. There will be only two holes in each spine: at the measurement of the top and bottom of the window. An easy way to mark this is to gather your signatures, put them into the book how they will eventually sit, and mark with a pencil along the top and bottom edge of the window. With the marks on the outside, it’s easier to cut using an X-acto knife. Alternatively, you can measure with a ruler and poke the holes from the inside.
Mark spine holes

Cut spine holes

The signatures
Once the holes are punched, you’re ready to stitch. For this stitching method, you will stitch the top half, then the bottom half of all the signatures.
For the top, measure out your thread equal to the height of the spine piece, multiplied by the number of signatures, multiplied by 2.5 (i.e. a book that has 2 inches of spine on the top piece with five signatures will have 25 inches of thread to stitch the top [same for the bottom if it’s also 2 inches tall].). Tie a knot at one end, leaving about 0.5 to 0.75 inches at the end. Thread your needle.
Stack your signatures in the order you wish to stitch them in. You can start with the front signature or the back, it doesn’t really matter.
Begin by threading your needle through the top hole of the first signature, inside to outside.
Loop around the top part of the cover’s spine, over the top of the book and back out through the same hole. Pull it tight.
Next, thread the needle in through the second signature (from the outside). Loop the thread up, over the spine, and down to the stitch. To complete the stitch, tuck the needle under the line of thread between the first and second signatures. Pull it tight. This makes a loop to connect the signatures together.
Thread the needle into the third signature. Repeat the steps of the second signature, looping up, over and down again, then tucking the needle under the previous stitch to finish. Continue this pattern for the rest of the signatures.
After the final signature, loop the needle through the previous stitch as always, and then simply go back in through the same hole in the final signature. Tie off the end with a knot by looping your needle under the thread and pulling tight. Trim off the excess and tuck the thread underneath so it’s tidy.
Repeat the above steps with the bottom half of the book now.
Measure thread (2.5 x height of spine piece x # of signatures)

First hole, thread needle out, around, and out again

Into second signature

Complete the stitch

Continue stitching

Final hole, in, tie off
Once a book has been fully stitched, I like to shift it back and forth to even out the stitches so they aren’t too loose or too tight. Then I place it under something heavy (or in a book press) for a day or two to let it be pressed flat. For this stitch in particular, I also like to adjust and shift the exposed threads on the spine so that they’re evenly spaced.
You’ve just completed your first Buttonhole stitch book!
Buttonhole Stitch Tutorial
Case Binding Tutorial
Chain Stitch Tutorial
Coptic Stitch Tutorial
Cross Stitch Tutorial
Dash Stitch Tutorial
French Link Stitch Tutorial
Japanese Stab Binding Tutorial
Long Stitch Tutorial
Leather Binding Tutorial
Saddle Stitch Tutorial
Tigerpetal Press is a small book press dedicated to publishing local authors and poets.